Are you frustrated because the ‘Add to Cart’ button on your WooCommerce website is not working? Don’t worry, we’ve got you covered! In this article, we will provide you with easy and effective solutions to fix this issue. You’ll learn ways to Fix Add To Cart Button Not Working Woocommerce. Imagine having a smooth online shopping experience where customers can easily add products to their cart and proceed with their purchase without any hassle. But when that ‘Add to Cart‘ button fails to function properly, it can be a major hindrance for your business.
Fortunately, there are several simple steps you can take to resolve this problem. From clearing your browser cache and checking for plugin conflicts to updating WooCommerce and verifying product settings, we will guide you through each process step-by-step to Fix Add To Cart Button Not Working Woocommerce. So, if you’re ready to regain control of your online store and ensure that the ‘Add to Cart’ button works flawlessly for every customer, let’s dive right in!
What problems might users encounter if the Add to Cart button is not functioning properly?
If the “Add to Cart” button is not working on a shopping website or app, it can lead to numerous problems for users and the business alike:
- Frustration and Poor User Experience: If users can’t add products to their cart, they may become frustrated and leave the website, leading to a poor user experience. This can impact the reputation of the website or brand and reduce customer loyalty.
- Lost Sales: The most direct impact is the potential loss of sales. If a customer can’t add an item to their cart, they can’t buy it. This may result in significant revenue loss for businesses, especially if the problem persists.
- Increased Customer Support Requests: If the ‘add to cart’ button is not working, there may be an influx of customer support inquiries, which can put pressure on the support team and also increase operating costs.
- Distrust: Consistent technical issues can lead to users losing trust in the platform, which can impact the reputation of the business.
- Drop in Site Traffic: If users know that a website has functionality issues, they might stop visiting it altogether. This drop in traffic can potentially impact the website’s search engine rankings.
- Abandoned Carts: If the issue is intermittent and users are occasionally able to add products to the cart, they might still abandon the purchase out of frustration or fear of further issues during the checkout process.
- Data Analysis Problems: Businesses often track user behavior data, such as popular products or peak shopping times. If users can’t add items to their cart, this data becomes inaccurate, which can lead to wrong business decisions.
- Difficulty in Tracking Inventory: If the ‘add to cart’ feature is not functioning properly, it might lead to problems in tracking inventory as the business might not be able to effectively monitor which items are in demand.
- Impact on Marketing Efforts: Marketing strategies like remarketing or targeted advertising depend on user actions like adding a product to the cart. If this feature doesn’t work, the effectiveness of these strategies could be compromised.
In conclusion, a malfunctioning ‘add to cart’ button is a significant issue that can have wide-ranging impacts. It’s crucial for businesses to regularly test and maintain their website functionality to avoid these issues.
9 Easy Ways To Fix Add To Cart Button Not Working Woocommerce
1. Clearing Your Browser Cache
You definitely won’t believe how clearing your browser cache can magically fix the ‘add to cart’ button that seems to have a mind of its own. It’s a simple solution that can solve many WooCommerce woes. When you visit a website, your browser saves certain files and data to make subsequent visits faster. However, sometimes these stored files can become corrupted or outdated, causing conflicts with the website’s functionality.
To clear your browser cache,
- Start by opening your browser settings.
- Look for the ‘Clear browsing data’ or ‘Privacy’ section.
- Within this section, you’ll find an option to clear your cached files and images.
- Select this option and choose the appropriate time range (e.g., last hour, last day) depending on when you started experiencing issues with the ‘add to cart’ button.
- Once you’ve selected the desired time range, click on the ‘Clear data’ or similar button. Your browser will then remove all cached files from that time period.
- After clearing the cache, refresh the webpage where you encountered problems with the ‘add to cart’ button.
By clearing your browser cache regularly, you ensure that any outdated or corrupted files are removed, allowing websites like WooCommerce to function properly. So give it a try and regain control over your online shopping experience!
2. Checking for Plugin Conflicts
By examining the compatibility of various plugins, you can identify potential conflicts that may be causing issues with your WooCommerce add-to-cart button. It’s important to ensure that all the plugins you have installed on your website are compatible with each other and with the version of WooCommerce you are using.
To check for plugin conflicts, follow these steps:
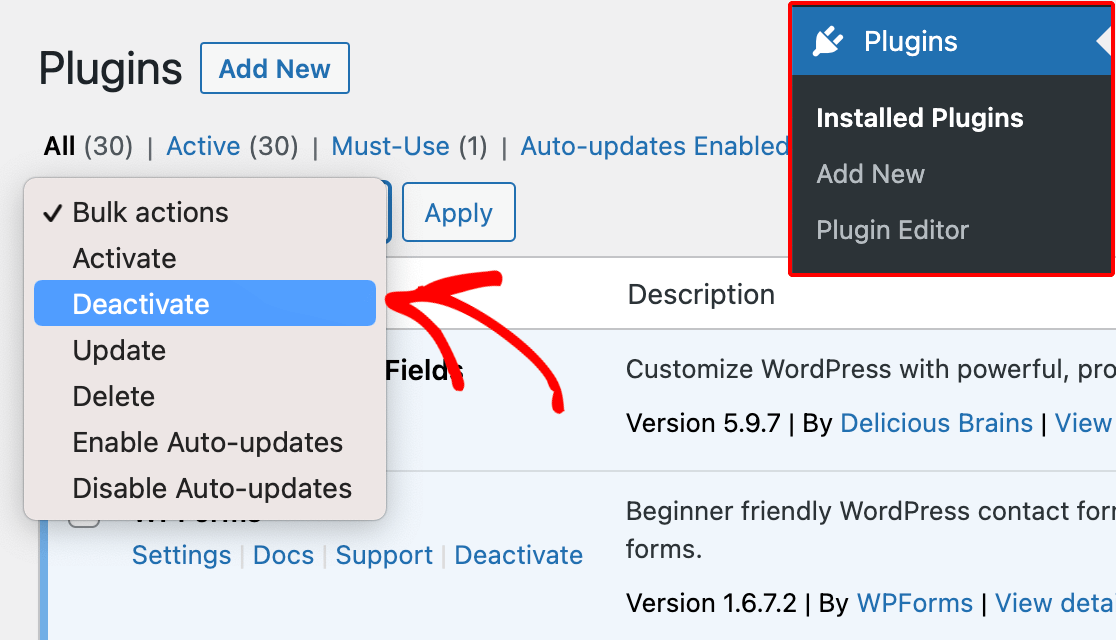
- Deactivate all other plugins except for WooCommerce.
- Test if the add to cart button is working properly now. If it is, then one of the deactivated plugins was causing the conflict.
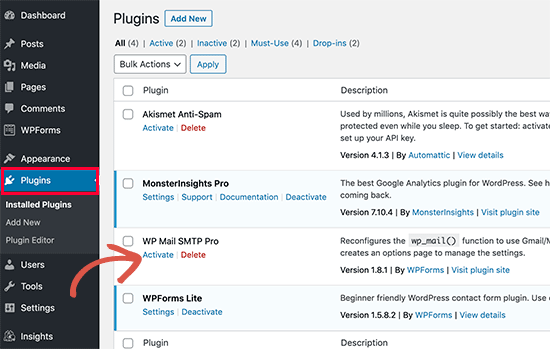
- Reactivate each plugin one by one and test the add to cart button after activating each one. This will help you pinpoint which plugin is causing the issue.
Here is an emotion-evoking table that shows how frustrating it can be when your add-to-cart button doesn’t work due to plugin conflicts:
| Frustration | Plugin Conflicts | Incompatibility |
|---|---|---|
| High | Yes | Yes |
| Moderate | Yes | No |
| Low | No | N/A |
Remember, finding and resolving plugin conflicts can be a bit technical, but doing so will give you the freedom to offer a smooth shopping experience for your customers.
3. Updating WooCommerce and Theme
To ensure a smooth shopping experience, make sure to regularly update your WooCommerce platform and theme. Keeping your WooCommerce and theme up-to-date is essential for optimal functionality and performance. Here are four easy steps to help you update them:
- Check for available updates: Navigate to the WordPress dashboard, click on ‘Updates,‘ and look for any available updates for both WooCommerce and your theme. If updates are available, proceed to the next step.
- Backup your website: Before updating anything, it’s crucial to create a backup of your website. This ensures that in case anything goes wrong during the update process, you can easily restore your site to its previous state.
- Update WooCommerce: Start by updating WooCommerce first. Simply click on the ‘Update Now button next to the WooCommerce update notification. Wait for the process to complete.
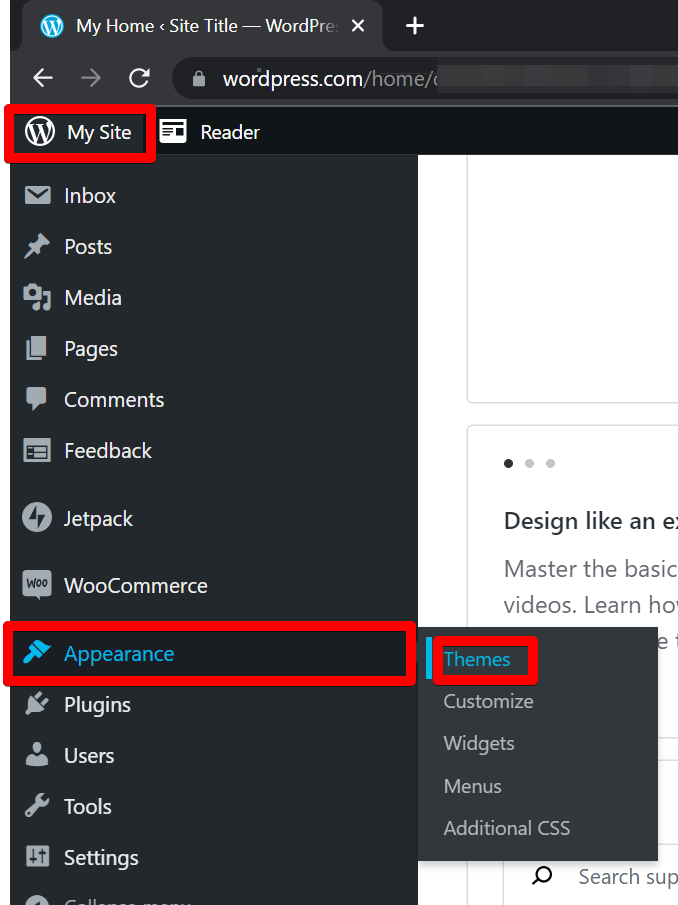
- Update your theme: After updating WooCommerce, move on to updating your theme. Go to the Appearance section in the WordPress dashboard and click on ‘Themes.’ Find your active theme and click on the ‘Update Now’ button if an update is available.
By following these steps regularly, you’ll not only fix any potential issues with add-to-cart buttons but also enjoy enhanced security features, improved performance, and access to new features offered by updated versions of WooCommerce and themes. Keep freedom at hand by ensuring a hassle-free shopping experience for yourself and your customers through regular updates.
4. Verifying Product Settings
Verifying the product settings ensures that all the necessary information and configurations are accurately set up for a seamless shopping experience. It’s crucial to check the product details, inventory, and pricing to ensure they’re correctly entered in WooCommerce.
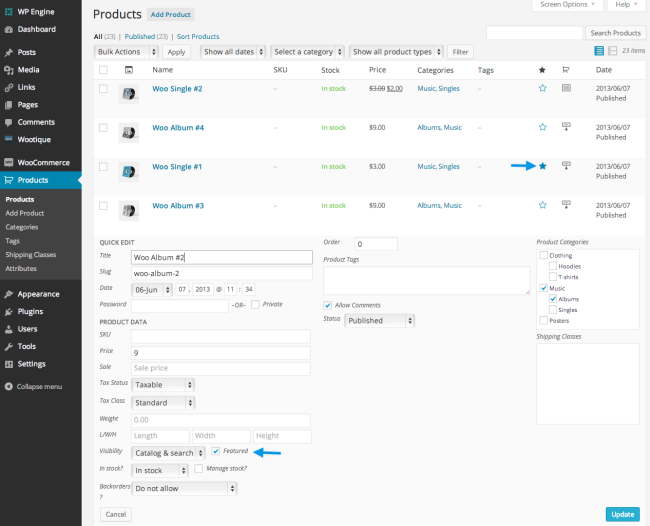
- Start by navigating to the WordPress dashboard and selecting ‘Products‘ from the left-hand menu.
- From there, choose the specific product you want to verify.
- Double-check that the title, description, and images accurately represent the product.
- Next, review the inventory settings. Make sure you have enough stock available for customers to purchase. If not, update the quantity or enable backorders if applicable.
- Additionally, confirm that your pricing is correct. Check both regular and sale prices if applicable. Make sure any discounts or coupons are correctly applied.
- Another important aspect is checking variations if your product has different options like size or color. Verify that each variation has its own price and stock availability specified.
- Lastly, don’t forget about shipping settings! Confirm that weight and dimensions are accurate for accurate shipping calculations.
By meticulously verifying these product settings in WooCommerce, you can guarantee a smooth shopping experience for your customers while enjoying freedom from any worries about inaccuracies or glitches with your add-to-cart button functionality.
5. Troubleshooting JavaScript Errors
If you’re experiencing frustration with your online store, troubleshooting JavaScript errors is like trying to fix a broken machine without knowing which part is causing the malfunction. It’s like searching for a needle in a haystack, but once you identify and fix the error, your website will run smoothly again.
When it comes to troubleshooting JavaScript errors, there are several steps you can take to pinpoint and resolve the issue.
- One of the first things you should do is check the browser console for any error messages. The console provides valuable information about what might be causing the problem.
- Next, you can use browser developer tools to debug and analyze your website’s code. These tools allow you to step through your JavaScript code line by line, helping you identify where the error occurs. You can also inspect elements on your page and view their associated JavaScript functions.
To give you a clearer picture of how these steps work together, here’s an example table:
| Step | Action | Result |
|---|---|---|
| 1 | Check the browser console for error messages | The error message indicates missing semicolon in code |
| 2 | Use developer tools to locate errors in code | Error found on line 56 of the main.js file |
| 3 | Fix the error by adding a missing semicolon | Error resolved, add to cart button now working |
By following these troubleshooting steps, you’ll be one step closer to fixing any JavaScript errors that may be affecting your add-to-cart button functionality. Remember that patience and persistence are key when it comes to troubleshooting technical issues.
6. Resetting Permalinks
Now that you’ve successfully troubleshot JavaScript errors, let’s move on to the next step in fixing the ‘add to cart’ button not working issue in WooCommerce. The current subtopic we’ll be discussing is resetting permalinks.
Resetting permalinks can often resolve issues related to URLs and link structures. It helps refresh the permalink settings and ensures they’re correctly configured for your website. Here’s how you can do it:
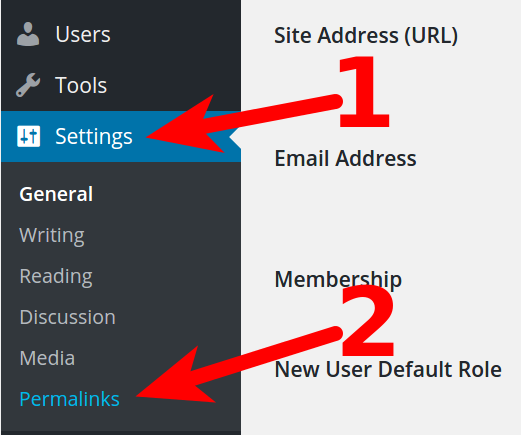
- Go to your WordPress dashboard and navigate to ‘Settings’ -> ‘Permalinks’.
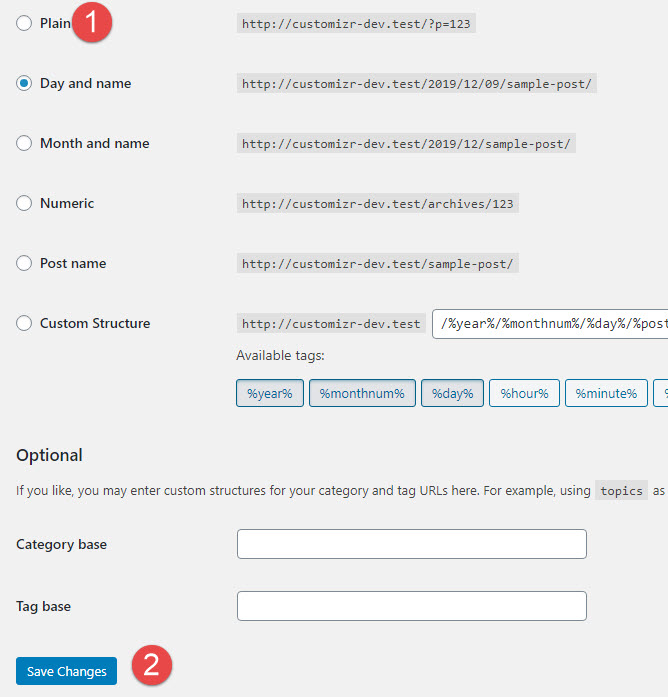
- In the Permalinks settings page, select a different permalink structure option than the one currently selected.
- Click on the ‘Save Changes button at the bottom of the page.
This action will reset your permalinks, and then you need to change them back to your preferred structure by following the same steps mentioned above. By resetting your permalinks, you’re giving your website a fresh start in terms of URL configuration. This can help resolve any conflicts or errors that might be causing issues with your ‘add to cart’ button functionality.
7. Checking for Theme Compatibility
To ensure the smooth functionality of your website, it’s important to check if your theme is compatible with WooCommerce. The compatibility between the theme and WooCommerce can affect various aspects, including the add-to-cart button functionality. If you’re experiencing issues with the add to cart button not working in WooCommerce, it could be due to a compatibility problem.
- Firstly, you need to verify that your theme supports WooCommerce.
- Go to the appearance settings in your WordPress dashboard and navigate to themes.
- Look for a section that mentions WooCommerce compatibility or integration. If you don’t find any reference, it’s likely that your current theme doesn’t fully support WooCommerce features.
In such cases, consider changing your theme or reaching out to the theme developer for assistance. They might provide specific instructions or updates to make your current theme compatible with WooCommerce. Changing themes can be daunting as it may affect the overall design and layout of your website. Therefore, look for alternative options within your current theme first before switching completely.
Remember, ensuring theme compatibility is crucial for a seamless shopping experience on your website. By taking this step, you’ll be one step closer to resolving any issues with the add-to-cart button not working in Woocommerce and providing a smoother user experience for visitors on your site who desire freedom when making purchases.
8. Disabling Caching Plugins
Disabling caching plugins can help optimize the performance of your website and ensure a smoother shopping experience for your visitors. When caching plugins are enabled, they store a static version of your web pages, which can cause issues with dynamic elements like the ‘Add to Cart’ button on WooCommerce.
To disable caching plugins and resolve this issue, follow these steps:
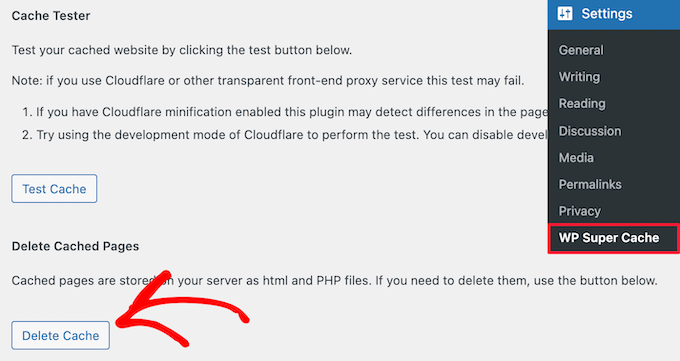
- Identify the caching plugin you’re using on your WordPress site. Common ones include WP Super Cache, W3 Total Cache, and WP Rocket.
- Access the settings or options page of the caching plugin within your WordPress dashboard.
- Look for an option to temporarily disable or turn off the cache. This may be called ‘Enable/Disable Caching’ or something similar.
- Toggle the switch or checkbox to disable the caching feature temporarily.
By disabling the caching plugin, you allow WooCommerce to generate dynamic content in real-time, ensuring that the ‘Add to Cart’ button functions properly and reflects accurate product availability. Remember to re-enable your caching plugin once you’ve resolved any issues with the ‘Add to Cart’ button. Disabling it permanently isn’t recommended as it can negatively impact overall website performance and loading speed.
9. Testing with a Default Theme
If you’re experiencing issues with your WooCommerce website, one effective way to troubleshoot is by testing it with a default theme. Sometimes, the problem lies within the theme you’re using, and switching to a default theme can help identify if that’s the case.
Here’s how you can do it:
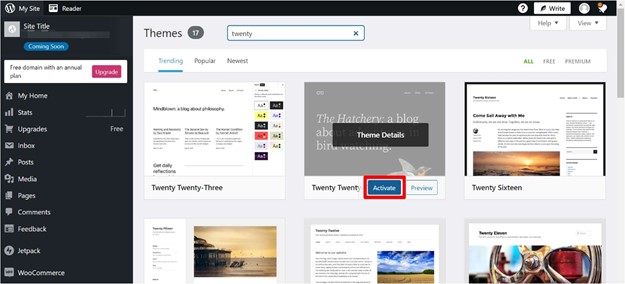
- First, go to your WordPress dashboard and navigate to ‘Appearance’ -> ‘Themes.’
- Find the default theme (usually named ‘Twenty Twenty-One’) and activate it.
- This will temporarily replace your current theme with the default one.
- Next, visit your website and check if the add to cart button is working properly now. If it is, then there might be a conflict between your previous theme and WooCommerce.
- You can try reaching out to the theme developer for assistance or consider using a different compatible theme.
- On the other hand, if the issue persists even with the default theme, then it’s likely not related to your current theme. In this case, you should continue troubleshooting by exploring other potential causes such as plugin conflicts or server configuration problems.
Testing with a default theme allows you to isolate the issue and determine whether it lies within your chosen theme or elsewhere in your setup. It’s an essential step in resolving add-to-cart button issues and ensuring smooth functionality for your WooCommerce store.
10. Using Custom CSS
Should there be a conflict between your current theme and your “add to cart” button or product page, causing the button to malfunction, the following code could help resolve it. Insert the below-mentioned code into the single.php file, which can be found within the Theme Editor beneath the function.php file:
// if you couldn’t find single.php file then add this code in index.php
if ( is_singular( 'product' ) ) {
wc_get_template_part( 'content', 'single-product' );
} else {
wc_get_template_part( 'content', 'single-product' );
}
11. Checking Server Configuration
To ensure smooth functionality of your website, it’s important to check the server configuration. This step is crucial in troubleshooting and resolving any issues related to the add-to-cart button not working on your WooCommerce site. Server configuration refers to the settings and parameters that determine how your server operates and interacts with your website.
Start by examining the PHP version running on your server. Ensure that it meets the minimum requirements specified by WooCommerce. Outdated PHP versions can cause conflicts and prevent certain functionalities from working properly. It’s recommended to use the latest stable release for better performance and security.
Next, verify that you have enough memory allocated for your WordPress installation. Insufficient memory can lead to various errors, including problems with the add-to-cart button. Increase the memory limit by modifying the ‘wp-config.php’ file or contacting your hosting provider for assistance.
Lastly, make sure that your server has all necessary extensions enabled, such as URL, OpenSSL, and GD Library. These extensions are required for certain features of WooCommerce to work correctly.
12. Seeking Support from WooCommerce Community
When facing problems with your add-to-cart button not working in WooCommerce, seeking support from the community can be a great solution. The WooCommerce community is filled with knowledgeable individuals who are passionate about helping others and solving technical issues.
To seek support from the WooCommerce community, start by visiting the WooCommerce forums or their official website. These platforms provide a space where users can ask questions and receive guidance from experienced members of the community. You can describe your specific issue regarding the add to cart button not working and provide any relevant details or error messages you have encountered.
When seeking support, it’s essential to be clear and concise in explaining your problem. Provide as much information as possible, such as your WordPress version, theme, and any plugins related to your e-commerce functionality. This will help others understand your situation better and provide more accurate solutions.
Conclusion
In conclusion, fixing the ‘Add to Cart’ button not working on WooCommerce can be achieved through a series of easy steps.
By clearing your browser cache, checking for plugin conflicts, updating WooCommerce and your theme, verifying product settings, troubleshooting JavaScript errors, testing with a default theme, debugging PHP errors, checking server configuration, and seeking support from the WooCommerce community, you can resolve this issue effortlessly. These simple yet effective solutions will ensure a smooth shopping experience for your customers. Don’t let a malfunctioning button hinder your business growth; take action now and optimize your website’s functionality.
FAQs ( Fix Add To Cart Button Not Working Woocommerce)
How can I fix the add to cart button not working issue if clearing my browser cache did not solve the problem?
To fix the add to cart button not working issue, try clearing your browser cache, disabling any conflicting plugins, and ensuring that your theme supports WooCommerce. If the problem persists, seek assistance from a professional developer.
What should I do if disabling caching plugins did not resolve the issue with the add to cart button?
If disabling caching plugins did not resolve the issue with the add to cart button, you can try checking for conflicts with other plugins or themes. Disable all other plugins and switch to a default theme to see if that solves the problem.
Are there any specific product settings that I need to check in order to fix the add to cart button not working problem?
To fix the add to cart button not working problem, check the product settings in WooCommerce. Ensure that the button is enabled and that there are no restrictions or conflicts with other plugins or settings.
How do I troubleshoot JavaScript errors that might be causing the add-to-cart button to malfunction?
To troubleshoot JavaScript errors causing your add-to-cart button to malfunction, start by inspecting the browser console for any error messages. Check if there are conflicts with other plugins or themes, and ensure your code is properly implemented.
Is there a way to reset permalinks to fix the issue with the add-to-cart button not working?
To reset permalinks in WooCommerce and potentially fix the add to cart button issue, go to your WordPress dashboard, navigate to Settings > Permalinks, select the “Post name” option, and click “Save Changes.”
