WordPress offers a versatile platform for content management, and its media library is a treasure trove of images, videos, and files that contribute to your website’s appeal. Sometimes, you might want to download your media library for backup, migration, or other purposes. In this article, we’ll discuss how to download WordPress media library using different methods. Let’s get started!
Why is it Important to Download the Entire Media Library in WordPress?
Your WordPress media library is a repository of valuable assets that contribute to your website’s content and visual appeal. Downloading the entire media library serves several crucial purposes:
- Backup and Disaster Recovery: Accidents happen, and websites can face data loss due to various reasons such as server crashes, hacking, or plugin conflicts. By downloading your media library, you create a backup that can be used to restore your website in case of emergencies.
- Migration and Redesign: If you’re planning to move your website to a new host or redesign it, having a copy of your media library ensures a seamless transition. You won’t have to worry about losing images, videos, and files that are essential for your site’s aesthetics and functionality.
- Media Management: Downloading your media library provides you with direct access to your media assets. This is particularly helpful if you want to organize, edit, or repurpose your media files offline.
Now, let’s explore five different methods to download your WordPress media library.
How to Download WordPress Media Library; 5 Easy Ways
If you run a website or a web developer, you may need to download the media library for several reasons as described earlier. Here, we’ll talk about five easy ways to download the WordPress media library. You can go through these easy ways to find the most comfortable method for yourself. The methods we are going to explain are as follows:
- Download WordPress Media Library Using Plugin
- Download WordPress Media Library via Cpanel
- Download WordPress Media Library via FTP
- Export WordPress Media Library Using WordPress Export
- Download WordPress BackUp, including the Media Library
1. How to Download WordPress Media Library Using a Plugin
Downloading your WordPress media library using a plugin offers a user-friendly and efficient way to safeguard your valuable assets. Here’s a step-by-step guide on how to accomplish this using a plugin like “Media Downloader”:
Step 1: Install the Plugin:
- Access WordPress Dashboard: Log in to your WordPress Dashboard.
- Navigate to Plugins: In the left sidebar, click on “Plugins” and select “Add New.”
- Search for the Plugin: In the search bar, type “Export Media Library” and press “Enter.”
- Install and Activate: Locate the plugin in the search results and click “Install Now.” After installation, click “Activate.”


Step 2: Access Export Media Library:
- Plugin Dashboard: In the left sidebar, you’ll find a new option named “Export” under the media options. Click on it to access the plugin’s interface.


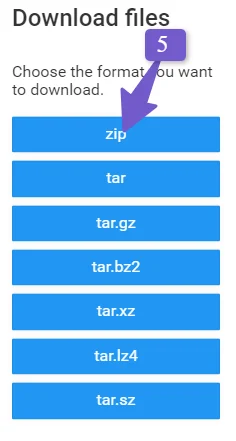
Step 3: Download the Zip File:
- On the Export Media Library page, there will be a dropdown menu. Select “single folder with all files” or Nested Folder” according to your need.
- Start to Download: Click the Download Zip button to initiate the process. The plugin will create a zip file containing the selected media files.

Step 4: Verify Downloaded Media Files:
- Open the Extracted Folder: If you extracted the zip file, open the resulting folder to access the downloaded media files.
- Check the Files: Verify that the downloaded files match the media assets you selected from your WordPress media library.
By following these steps, you can easily and effectively download your WordPress media library using a plugin like “Export Media Library.” This method provides a convenient way to create backups, manage your media assets offline, and ensure that your valuable content is securely stored for various purposes.
2. How to Download WordPress Media Library via cPanel
Downloading your WordPress media library via cPanel gives you direct access to your website’s files and offers a manual way to secure your media assets. Here’s a detailed step-by-step guide on how to achieve this:
Step 1: Access cPanel:
- Log in to Your Hosting Account: Log in to your web hosting account’s dashboard.
- Access cPanel: Find and access the cPanel dashboard. This can usually be done by clicking on the cPanel icon or by navigating to a specific URL provided by your hosting provider.
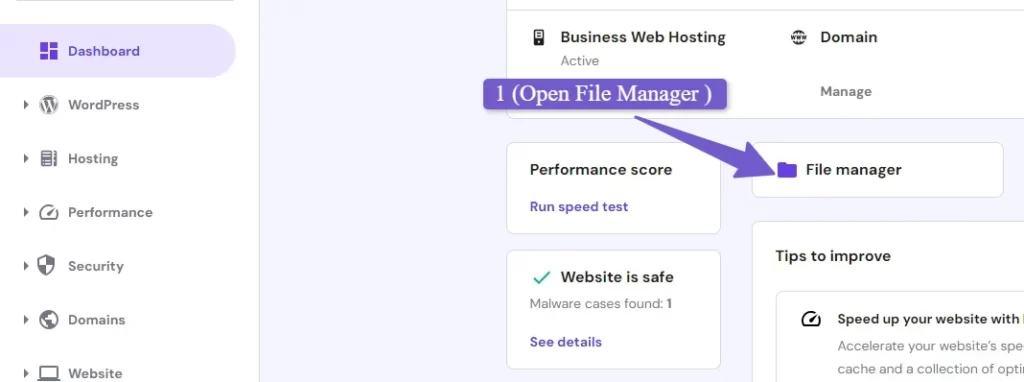
Step 2: Locate the “File Manager”:
- Find “File Manager”: Inside cPanel, search for the “File Manager” option. This allows you to access and manage your website’s files.
- Access “File Manager”: Click on “File Manager” to open the file management interface.
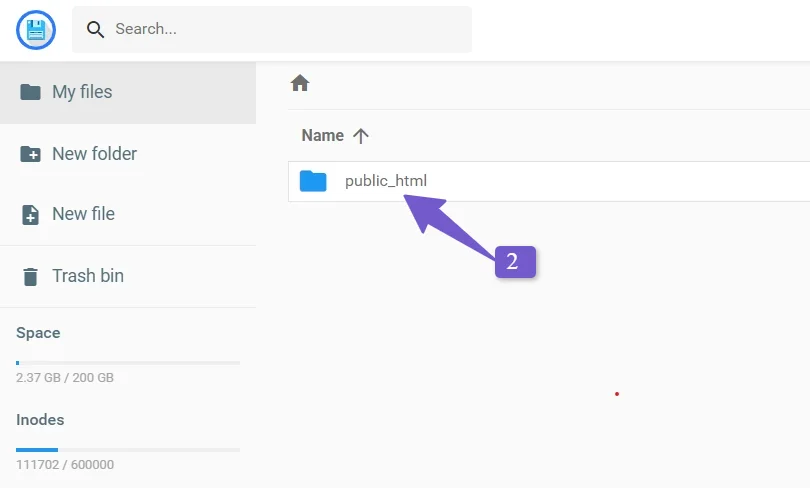
Step 3: Navigate to WordPress Directory:
- Locate “public_html”: In the “File Manager,” locate the “public_html” folder. This is where your WordPress files are usually stored.
- Access WordPress Folder: Double-click on the “public_html” folder to access it.
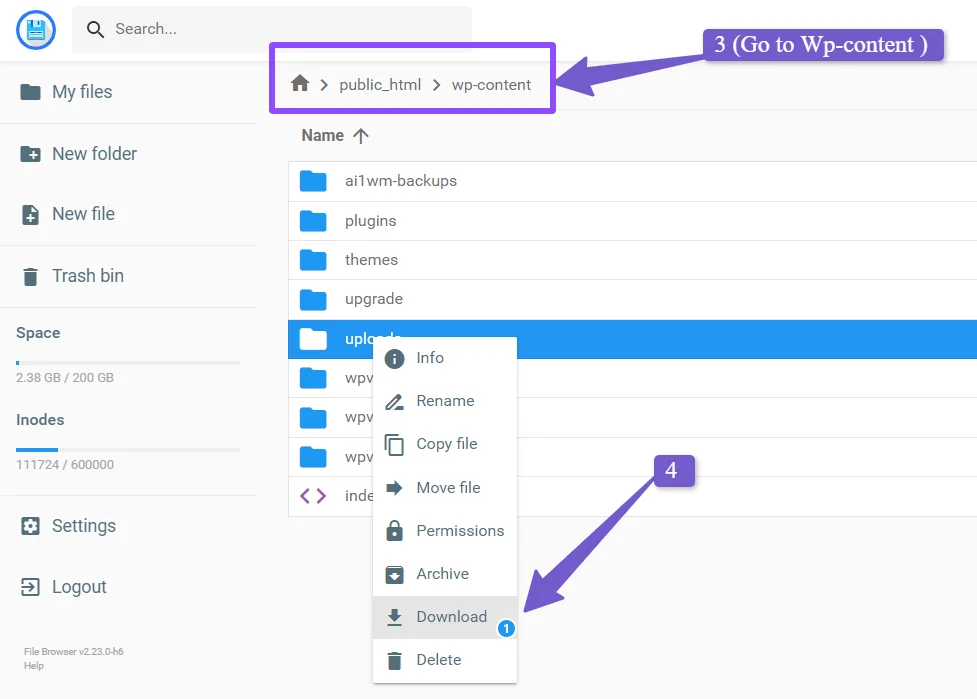
Step 4: Access the “wp-content” Folder:
- Locate “wp-content”: Within the “public_html” folder, look for the “wp-content” folder. Double-click to open it.
- Access the “uploads” Folder: Inside the “wp-content” folder, locate and open the “uploads” folder. This is where your media files are stored.
Step 5: Download Media Files:
- Select Media Files: Browse through the “uploads” folder to find the media files you want to download. Click on the files to select them.

- Right-Click and Compress: Once the files are selected, right-click on any of the selected files and choose the option to compress or zip the files. This will create a compressed file containing the selected media files.
- Download Compressed File: After compressing the files, you’ll see a zip file in the “uploads” folder. Right-click on the zip file and select the option to download it to your local device.
Step 6: Verify Downloaded Media Files:
- Extract Zip File: Locate the downloaded zip file on your local device and extract its contents.
- Check the Files: Open the extracted folder to verify that the downloaded media files match the assets from your WordPress media library.
By following these steps, you can successfully download your WordPress media library via cPanel. This manual method provides you with direct access to your files, giving you the control to secure and manage your media assets for backup, migration, or any other purposes you may have.
3. How to Download WordPress Media Library via FTP
Downloading your WordPress media library via FTP (File Transfer Protocol) allows you to directly access and retrieve your website’s files from the server. This method offers manual control over your media assets for various purposes, such as backup or migration. Here’s a comprehensive step-by-step guide:
Step 1: Obtain FTP Client Software:
- Download and Install FTP Client: Choose an FTP client software such as FileZilla, Cyberduck, or WinSCP. Download and install the software on your computer.
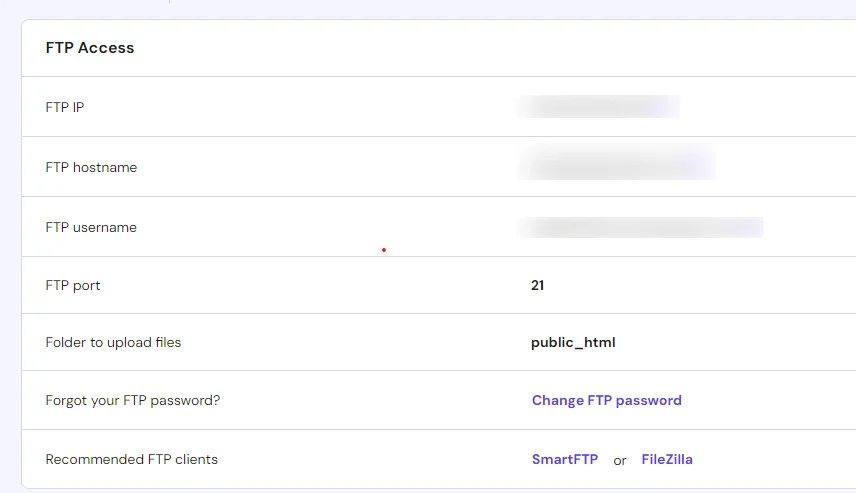
Step 2: Gather FTP Credentials:
- Access Your Hosting Account: Log in to your web hosting account’s dashboard.
- Find FTP Details: Look for FTP credentials, which usually include the FTP server address, username, password, and port number. These details are often available in your hosting account’s cPanel or through support documentation.

Step 3: Connect to Your Server:
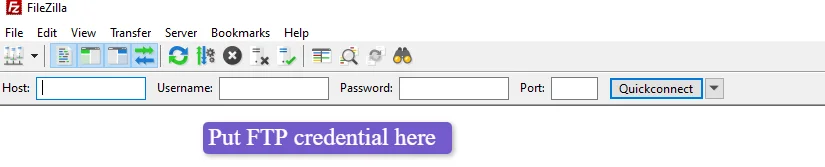
- Open FTP Client: Launch the FTP client software you installed.
- Enter Credentials: Enter the FTP server address, username, password, and port number in the appropriate fields within the FTP client.
- Connect: Click the “Connect” or “Quickconnect” buttons in the FTP client to establish a connection with your server.

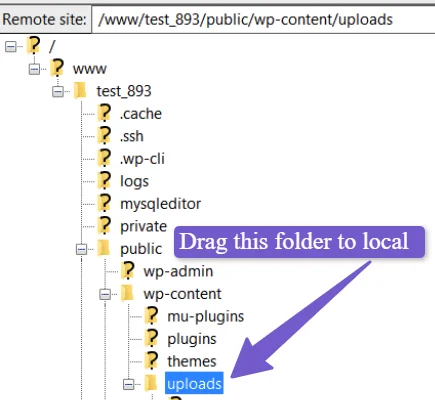
Step 4: Navigate to WordPress Directory:
- Locate “public_html”: Once connected, navigate to the “public_html” directory or the directory where your WordPress installation is located.
Step 5: Access “wp-content” Folder:
- Find “wp-content”: Inside the WordPress directory, locate and open the “wp-content” folder.
- Access “uploads” Folder: Within the “wp-content” folder, find and open the “uploads” directory. This is where your media files are stored.

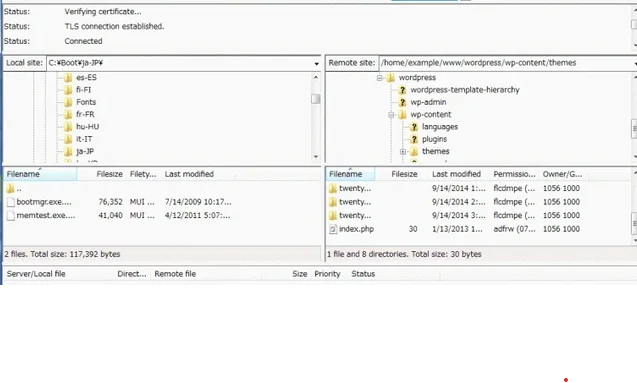
Step 6: Download Media Files:
- Select Media Files: Browse through the “uploads” folder to locate the media files you want to download. Click and select the files you wish to retrieve.
- Drag and Drop: Drag the selected media files from the FTP client’s remote panel (server) to the local panel (your computer). This will initiate the download process.

Step 7: Verify Downloaded Media Files:
- Check Local Folder: Navigate to the destination on your local computer where you dragged the files. Open the folder to ensure that the downloaded media files match your WordPress media library assets.
By following these steps, you can successfully download your WordPress media library via FTP. This method offers a hands-on approach, granting you direct access to your server’s files for the purpose of securing and managing your media assets as needed.
4. Export WordPress Media Library Using WordPress Export
Exporting your WordPress media library using the built-in WordPress export tool allows you to create an XML file containing references to your media files. This method is useful for transferring data between WordPress sites, but note that it doesn’t directly download the media files themselves. Here’s a detailed step-by-step guide:
Step 1: Access WordPress Dashboard:
- Log in to Your WordPress Dashboard: Enter your admin credentials to access your WordPress backend.
Step 2: Navigate to Export:
- Go to Tools: In the left sidebar, hover over “Tools” and select “Export.”
Step 3: Select Content to Export:
- Choose What to Export: On the export page, you’ll be presented with options to choose what to export. Select “Media” to include your media library references in the export.
- Click “Download Export File”: After selecting “Media,” click the “Download Export File” button. This will initiate the export process.
 Step 4: Verify the Exported File:
- Locate the XML File: Once the export is complete, you’ll be prompted to download an XML file. Save the file to your local device.
- Open XML File: Use a text editor to open the XML file. Inside, you’ll find references to your media files, including URLs.
Step 5: Verify the Media References:
- Search for URLs: Within the XML file, locate the URLs of the media files you want to download. These URLs reference the location of your media assets.
Step 6: Download Media Files (Optional):
- Use URLs to Download: You can use the URLs from the XML file to individually download each media file referenced. Open the URL in a browser, right-click on the media, and select “Save As” to save it to your local device.
By following these steps, you can export your WordPress media library using the WordPress export tool. While this method generates an XML file containing references to your media files, it’s important to note that it doesn’t directly download the media files themselves. Instead, it provides you with a list of URLs that you can use to retrieve your media assets.
5. Download WordPress Backup, Including the Media Library
Creating a full backup of your WordPress website, including the media library, ensures that all your content and assets are preserved. This method provides a comprehensive solution for backup and migration purposes. Here’s a detailed step-by-step guide:
Step 1: Install a Backup Plugin:
- Access WordPress Dashboard: Log in to your WordPress Dashboard.
- Navigate to Plugins: In the left sidebar, click on “Plugins” and select “Add New.”
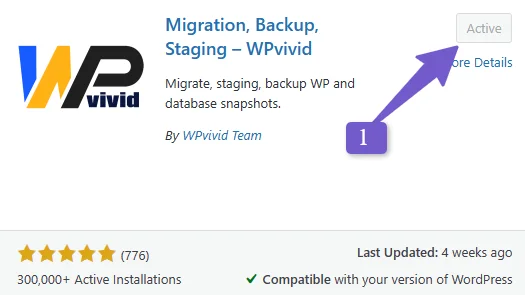
- Search for a Backup Plugin: Look for reputable backup plugins like “UpdraftPlus” or “WPvivid” or “BackupBuddy.” Install and activate your chosen plugin.

Step 2: Configure Backup Settings:
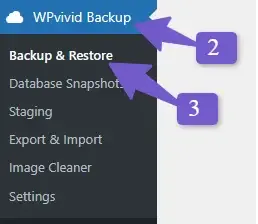
- Access Plugin Settings: After activation, locate the plugin’s settings within the WordPress Dashboard. This is usually found under “Settings” or a dedicated section for the backup plugin.

- Select Backup Content: In the plugin’s settings, choose to include your entire website, including the media library, in the backup.
- Specify Backup Frequency: Configure the backup frequency (e.g., daily, weekly) and retention settings (how many backup copies to keep).
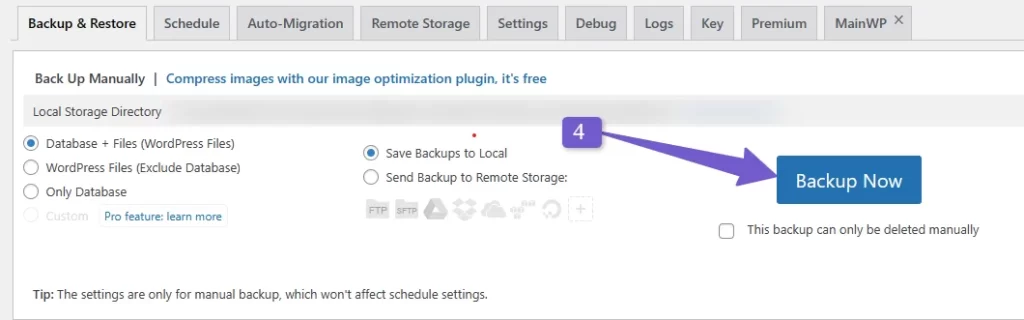
Step 3: Create a Backup:
- Initiate Backup: In the plugin settings, find the option to create a backup. Click the appropriate button to initiate the backup process.
- Wait for Backup Completion: Depending on the size of your website, the backup process may take some time. Wait for the backup to complete.

Step 4: Download the Backup File:
- Access Backup Files: After the backup is completed, the plugin should provide you with a list of backup files. Locate the latest backup file that includes your media library.
- Download Backup File: Find the “Download” or “Download Backup” button associated with the desired backup file. Click it to initiate the download.


Step 5: Verify Backup Contents:
- Open the Backup File: Once downloaded, open the backup file using a suitable software or unzip utility.
- Check Contents: Browse through the backup file’s contents to ensure that it includes your entire WordPress website, including your media library.
Step 6: Store Backup Securely:
- Save the Backup: Store the downloaded backup file in a secure location on your local device or an external storage solution.
- Consider Remote Storage: For added security, consider storing the backup file on a remote cloud storage service or an external hard drive.
By following these steps, you can successfully create and download a backup of your WordPress website, including the media library. Backup plugins offer a convenient and comprehensive way to ensure that all your content, including images, videos, and other media assets, is safely stored and readily available for backup, migration, or restoration purposes.
FAQs (How To Download WordPress Media Library)
Q1: How Can I Download All Media Files in My WordPress Media Library?
You can use plugins like “Media Downloader” or backup plugins such as “UpdraftPlus” to create a backup that includes all media files. Alternatively, you can use FTP or cPanel to manually download media files.
Q2: Can I Select Specific Media Files to Download, Rather Than Downloading athe Entire Library?
Yes, you can choose specific media files to download. Many plugins and manual methods allow you to select individual files or a group of files for download.
Q3: Is There a Built-In Method in WordPress to Download the Media Library?
WordPress provides an export tool that generates an XML file containing references to media files, but it doesn’t directly download the files themselves. Plugins and manual methods offer more comprehensive options.
Q4: Are There Any Limitations on the size of the Media Library I Can Download?
The size of the media library you can download may depend on your hosting environment, server settings, and available storage space. Larger media libraries may take longer to download.
Q5: Can I Download the Media Library to Migrate to a Different WordPress Site?
Yes, downloading your media library is essential for seamless website migration. Plugins, backup tools, and manual methods can help you create a backup of your media assets, ensuring they are available on the new site.