
Links play a crucial role in website navigation and user experience. In WordPress, a link refers to a clickable element that connects one web page to another, either within the same website or to an external website. Links are an essential part of web content as they enable users to navigate between different pages and resources, creating a seamless browsing experience. The default link color in WordPress might not always align with your website’s design or branding. Fortunately, WordPress provides various methods to change link colors to match your preferences. In this article, we will explore three methods of how to change link color in WordPress, along with the reasons for doing so.
When and Why to Change Link Color in WordPress?
Before diving into the methods, let’s briefly discuss when and why you might want to change link colors on your WordPress website. Link colors can affect user engagement, readability, and overall aesthetics. Here are some scenarios where changing link colors is beneficial:
- Branding: If your website has a specific color palette that represents your brand, you’ll want to ensure that the link colors align with these branding elements.
- Readability: Choosing the right link color can enhance the readability of your content, making it easier for users to identify and click on links.
- Accessibility: Some users may have visual impairments, making it essential to have sufficient contrast between link colors and the background to ensure accessibility.
- Aesthetics: Changing link colors can help you create a visually appealing design that complements your website’s overall look and feel.
How to Change Link Color in WordPress
Making links on your website look different is like giving them a special coat. You can choose a color that fits your website’s look. It’s like dressing them up in a new outfit! Changing link colors is a quick and cool way to make your website feel unique and fun. So go ahead, have some fun with your links, and make your website even more awesome!
Now, let’s explore the three methods to change link colors in WordPress.
Method 1: Change the Link Color in WordPress Theme
Customization
Using theme customization options in WordPress to change link color is advantageous because it’s user-friendly, doesn’t require coding, maintains theme design, offers real-time previews, allows easy reverting of changes, ensures compatibility, survives future theme updates, provides consistency, saves time, and considers accessibility. It’s a convenient way to modify the visual aspects of your website without needing technical skills or risking design integrity. here’s how to do it:
- Log in to your WordPress dashboard.
- Go to “Appearance” and select “Customize.“
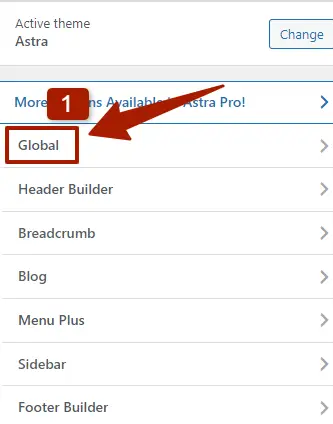
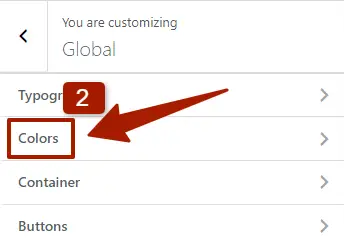
- In the Customizer, click on “global>Colors” or a similar option based on your theme.
-

 Look for the “Link Color” or “Primary Color” setting. This varies depending on your theme.
- Use the color picker to select the desired link color.

- Save and publish your changes.
 Look for the “Link Color” or “Primary Color” setting. This varies depending on your theme.
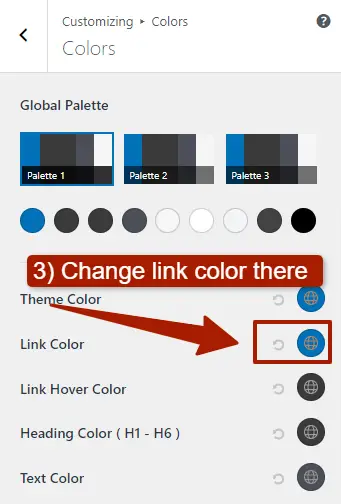
Method 2: Change Link Color With Custom CSS Code
Custom CSS in WordPress allows precise link color control, unlimited customization, and the ability to override theme styles. It offers responsive design, theme-independent consistency, faster loading, and a chance to learn, but requires some coding knowledge and may need updates when themes change.
- Log in to your WordPress dashboard.
- Navigate to “Appearance” and select “Customize.”
- Click on “Additional CSS” or a similar option based on your theme.
Enter the following code to change the link color:
a{
text-decoration: none;
color: green;
}
Replace “green” with the hex or RGB value of your chosen color.
Save and publish your changes.
How to Change Link Hover Color in WordPress
Changing the link hover color enhances user experience by providing visual feedback when users interact with links. This subtle change helps users understand link interactivity, improving website navigation. It also adds a touch of professionalism and customization to your design, making your website more engaging.
To change the link hover color, you can modify the CSS code as follows:
a:hover{
text-decoration: none;
color: blue;
}
Replace “blue” with the desired hover color.
How to Change Link Color for Blog Posts Only Using CSS Code
If you want to change the color of links in your blog posts, you can add custom CSS given below. Here’s how:
.entry-content a{
text-decoration: none;
color: green;
}
.entry-content a:hover{
text-decoration: none;
color: blue;
}
How to Change Individual Link Color Using CSS Code
Changing individual link colors adds a personal touch to your website. By doing this, you can make certain links stand out and catch people’s attention. It’s like using different colors to highlight important words in a book.
To assign a class, follow the steps given below;
- Navigate to the problematic section in the article and click on it.
- On the right-hand side, look for the “Block” tab.

- Scroll down to the very bottom to find “Additional Classes.“
- Add a class in the “Additional Classes” field.
- If you are using a different editor, assign a class to the specific paragraph in question.


Now is the time to insert the code.
-
- Edit the post or page where you want to change link colors.
- In the visual editor, switch to the HTML or Text mode.
- Wrap the link with a
spantag and assign a custom class:
.myclass a{
text-decoration: none;
color: green;
}
.myclass a:hover{
text-decoration: none;
color: blue;
}
Replace “myclass” with the class you used and “green/red” with the desired color.
Method 3: Individually Change the Link Color in WordPress Post Editor
In this third method, I’m going to guide you through changing the color of a single individual link directly within the WordPress post editor. Unlike the previous methods that involved coding, this approach utilizes the built-in tools of the editor. Let’s dive into the process step by step:
- Access Your Post/Page Editor: Start by logging in to your WordPress dashboard. Then, navigate to the post or page where you want to modify the color of an individual link.
- Locate the Individual Link: In the editor, locate the specific link you wish to change the color for. Highlight the entire link using your cursor.
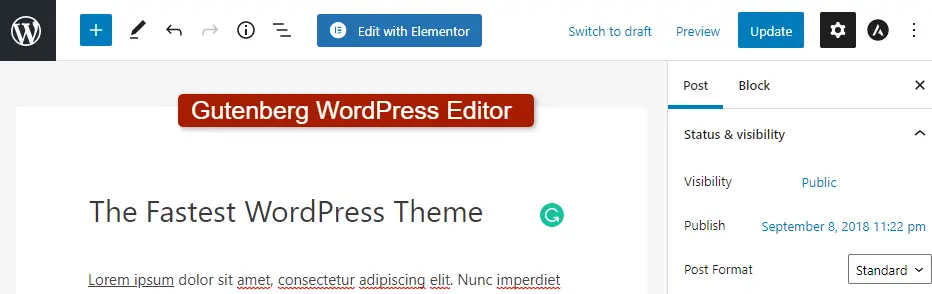
- Use the Block Tab: On the right-hand side of the editor, you’ll notice a tab called “Block.” Click on this tab to reveal additional settings for the selected link.
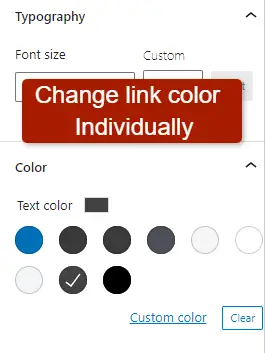
- Navigate to the Color Setting: Once you’ve opened the Block tab, look for the “Color” option. Clicking on this option will allow you to modify the color of the individual link.
- Select a New Link Color: Upon clicking the Color option, a color palette or color picker will appear. Choose a new color that you’d like to apply to the individual link. You can either pick a color from the available options or input a custom color code.

- Preview the Changes: As you adjust the color, you’ll see an instant preview of how the individual link will appear with the new color. This lets you ensure that the chosen color aligns with your design preferences.
- Save Your Changes: Once you’re satisfied with the new link color, simply save your changes. This can usually be done by clicking an “Update” or “Publish” button, depending on whether you’re working on a draft or a published post/page.
Compatibility with Page Builders
It’s worth noting that this method works seamlessly with various page builders like Elementor, Divi, Beaver Builder, and others. Regardless of the builder you’re using, the underlying method remains consistent. You can locate the Block tab or similar settings specific to the builder, allowing you to easily customize the color of individual links within your content.
In conclusion, changing link colors in WordPress is a simple process that can greatly impact the visual appeal and user experience of your website. Whether you choose to make global changes via theme customization or fine-tune individual links using custom CSS, WordPress provides the flexibility to match link colors with your design preferences and branding. By following the methods outlined in this article, you can confidently customize link colors and enhance the overall look and functionality of your WordPress website.
FAQs