In the ever-evolving landscape of website security, ensuring a secure connection is paramount. The move from HTTP to HTTPS has become a standard practice to safeguard user data and enhance website credibility. If you’re running a WordPress site and haven’t made the switch yet, in this article you will learn how to redirect HTTP to HTTPS in WordPress.
A significant shift has been observed in recent statistics, with 95% of the top 100 non-Google sites and 84.5% of all websites worldwide adopting HTTPS as of November 2023, according to the Google Transparency Report and W3Techs. This underscores the importance of secure connections. In this comprehensive guide, we’ll explore the differences between HTTP and HTTPS, the motivations for making the switch, and provide a detailed, step-by-step walkthrough on redirecting HTTP to HTTPS in WordPress.
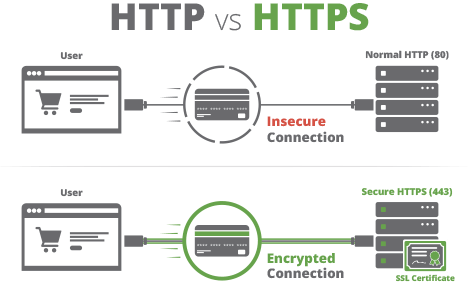
Before delving into the technicalities, it’s essential to understand the importance of HTTPS. HyperText Transfer Protocol Secure (HTTPS) encrypts the data exchanged between a user’s browser and your website, preventing unauthorized access and data tampering. This encryption not only secures user information but also improves your site’s SEO, as search engines like Google prioritize secure websites in their rankings.
Differences Between HTTP and HTTPS
Understanding the differences between HTTP and HTTPS is crucial for website owners. These differences encompass security, data integrity, and SEO implications. Notably:
HTTPS requires an SSL certificate for encryption and identity verification, while HTTPlacks these security measures.
HTTPS protects against man-in-the-middle attacks, securing sensitive information.
HTTPS improves SEO rankings, as search engines prioritize secure sites.
Real-life examples illustrate the analogy: sending a letter using HTTP is like sending an unsealed letter, while HTTPS involves a sealed envelope with a secret code.
How to Redirect HTTP to HTTPS in WordPress:A Step-by-Step Guide
In this comprehensive guide, we’ll explore different methods to redirect HTTP to HTTPS in WordPress. Each method has its advantages, and the choice depends on your preferences and technical comfort.
1. Get an SSL Certificate:
The first step towards transitioning to HTTPS is obtaining an SSL (Secure Socket Layer) certificate. Many hosting providers offer free SSL certificates, making the process hassle-free. Once activated, the certificate encrypts data transmitted between your server and users’ browsers.
SSL/TLS certificates use public and private keys for encryption and decryption, ensuring that only the intended recipient (the website) can access the data. These certificates also verify the website’s identity, protecting against fake sites and preventing data tampering during transfer.
2. Update WordPress Settings:
Enter your credentials to access the admin panel.
Click on “Settings” in the left-hand menu.
Change both the “WordPress Address (URL)” and “Site Address (URL)” to start with “https://.”
Scroll down and click “Save Changes” to update your settings.
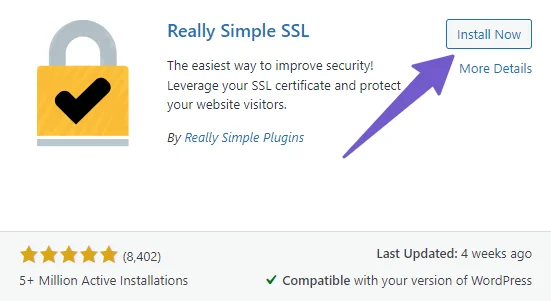
3: Using Really Simple SSL Plugin
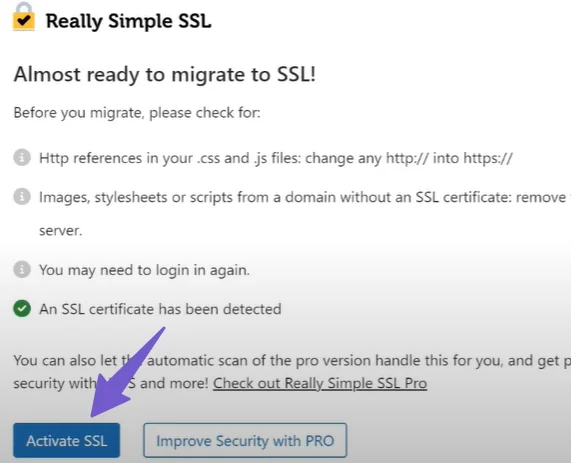
Step 1: Install and Activate Really Simple SSL Plugin
After activation, you’ll be redirected to the plugin’s settings page.
A popup will appear. Click on the “Activate SSL” button.
The plugin will automatically redirect all HTTP URLs to HTTPS.
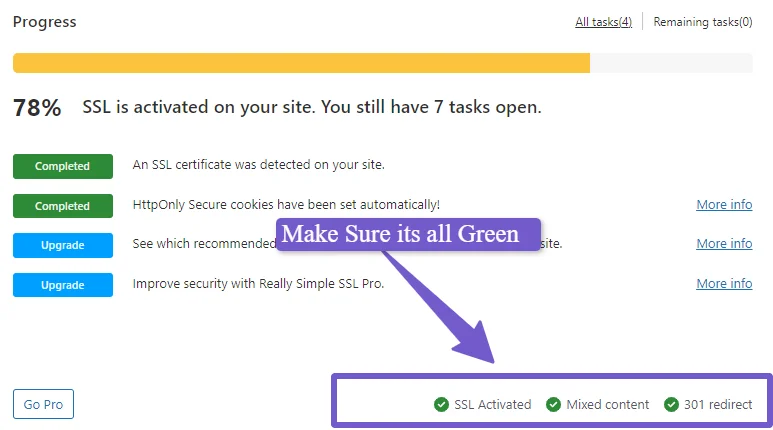
Step 3: Manual Verification
Go to “Settings” and click on “SSL.”
Ensure that all checkmarks are green, indicating no mixed content issues.
Manually test the redirection by entering the HTTP version of your domain (e.g., http://yourdomain.com) in the address bar. It should redirect to the HTTPS version.
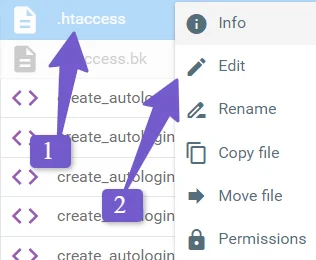
4: Manual Redirection Using .htaccess
Edit .htaccess File
Access your WordPress files using cPanel or FTP.
In the root folder (public_html), locate the .htaccess file. If not visible, enable the option to show hidden files.
Edit the .htaccess file and paste the following code at the end:
<IfModule mod_rewrite.c>
RewriteEngine On
RewriteCond %{HTTPS} off
RewriteRule ^(.*)$ https://%{HTTP_HOST}%{REQUEST_URI} [L,R=301]
</IfModule>
Save the file.
Manual Testing
Refresh your site. A padlock icon should appear next to the address bar, indicating a secure connection.
Manually verify the redirection by typing the HTTP version of your domain in the address bar. It should redirect to the HTTPS version.
5: Redirecting with PHP Code (Advanced Users)
While not recommended for most users, here is the PHP code for redirecting from HTTP to HTTPS. This method requires adding the code to every page, making it less practical for larger websites.
After successfully redirecting to HTTPS, follow these crucial post-redirection steps:
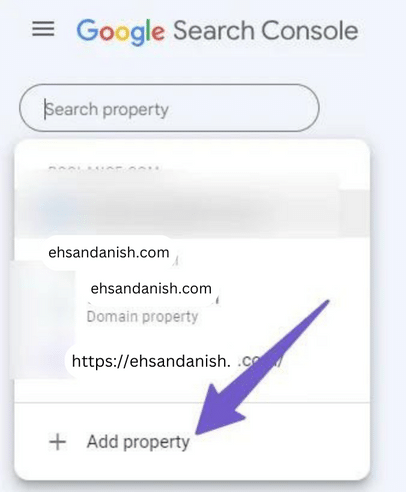
1. Add HTTPS Version to Google Search Console
Log in to Google Search Console.
Click on your domain in the upper left corner.
Add the HTTPS version as a new property and verify it.
2. Integrate HTTPS Version into Google Analytics (GA4)
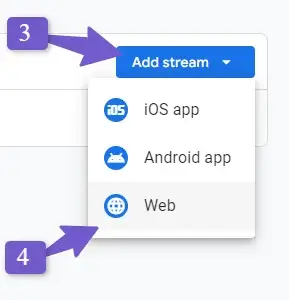
In Google Analytics, click on “Admin” in the lower-left corner.
Navigate to data streams and add the HTTPS version as a new stream.
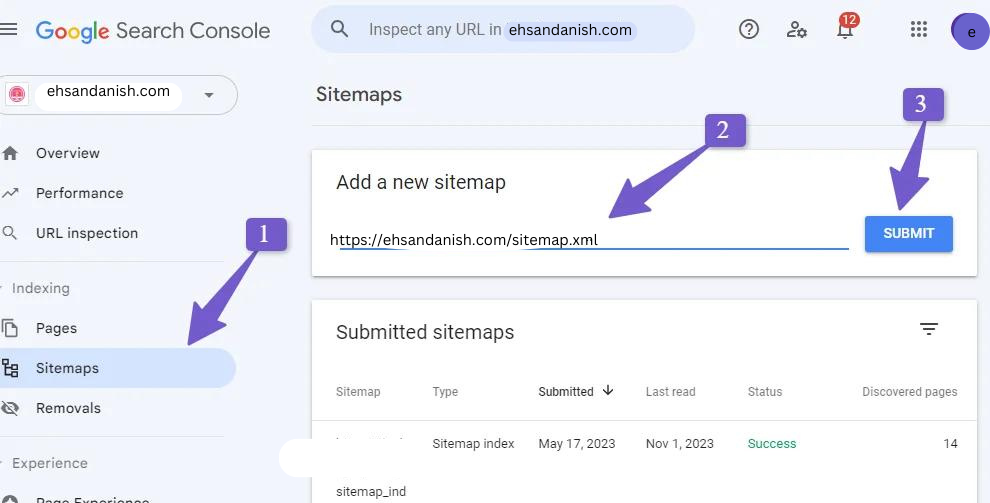
3. Resubmit Sitemap in Google Search Console
Generate a new sitemap using an SEO plugin.
Submit the updated sitemap to Google Search Console.
4. Update Disavow File (if applicable)
If you’ve submitted a disavow link file, re-submit it for the HTTPS version.
By following these detailed steps, you ensure a seamless transition to HTTPS, enhancing your site’s security, user trust, and SEO ranking.
Conclusion
In conclusion, redirecting from HTTP to HTTPS is not merely a security enhancement but aligns with industry standards, search engine preferences, and user expectations. Following this detailed guide ensures that website owners, regardless of their technical expertise, can seamlessly transition to a secure and encrypted environment, fostering trust, improving SEO rankings, and safeguarding user data.
FAQs
Is it good practice to redirect HTTP to HTTPS?
Websites can be accessed over HTTP or HTTPS, though the HTTPS protocol is recommended for security purposes. Because HTTP traffic is not encrypted, any data being transferred is not secure.
What is the difference between HTTP redirect and GET?
Redirect: After a post request, the correct webpage with the changed data is delivered to the client using the redirect instruction (HTTP 303). GET: The client requests a confirmation page. When reloading, this is also done without a database change and possibly resultant duplicate content.
What is the function of redirect in HTTP?
In HTTP, redirection is triggered by a server sending a special redirect response to a request. Redirect responses have status codes that start with 3 , and a Location header holding the URL to redirect to. When browsers receive a redirect, they immediately load the new URL provided in the Location header.
Why is it strongly recommended to implement HTTP 2 when switching to HTTPS?
HTTPS secures the connection between a visitor’s browser and the web server, ensuring data is encrypted and protected from intermediary actions. HTTP/2 allows for multiplexing (requesting multiple files at the same time). This significantly improves both site performance and server efficiency.
Can a web server use both HTTP and HTTPS?
If you have been using distinct IP addresses for each hostname, you can easily support both HTTP and HTTPS for all clients. However, most site operators use name-based virtual hosting to conserve IP addresses and because it’s more convenient in general.
I'm Mariah Aziz, a dedicated contributor/writer on this blog. With a passion for simplifying the complexities of the web, I bring you insightful articles about WordPress. You can rely on me to help you understand WordPress better as I have hands-on experience as a skilled web developer and designer.


 Navigate to data streams and add the HTTPS version as a new stream.
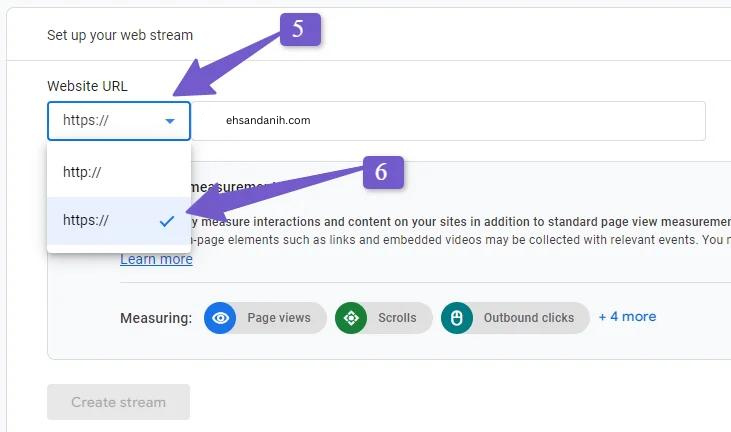 3. Resubmit Sitemap in Google Search Console